Modern Granny Square Tote Bag Free Crochet Pattern: Step-by-Step Guide
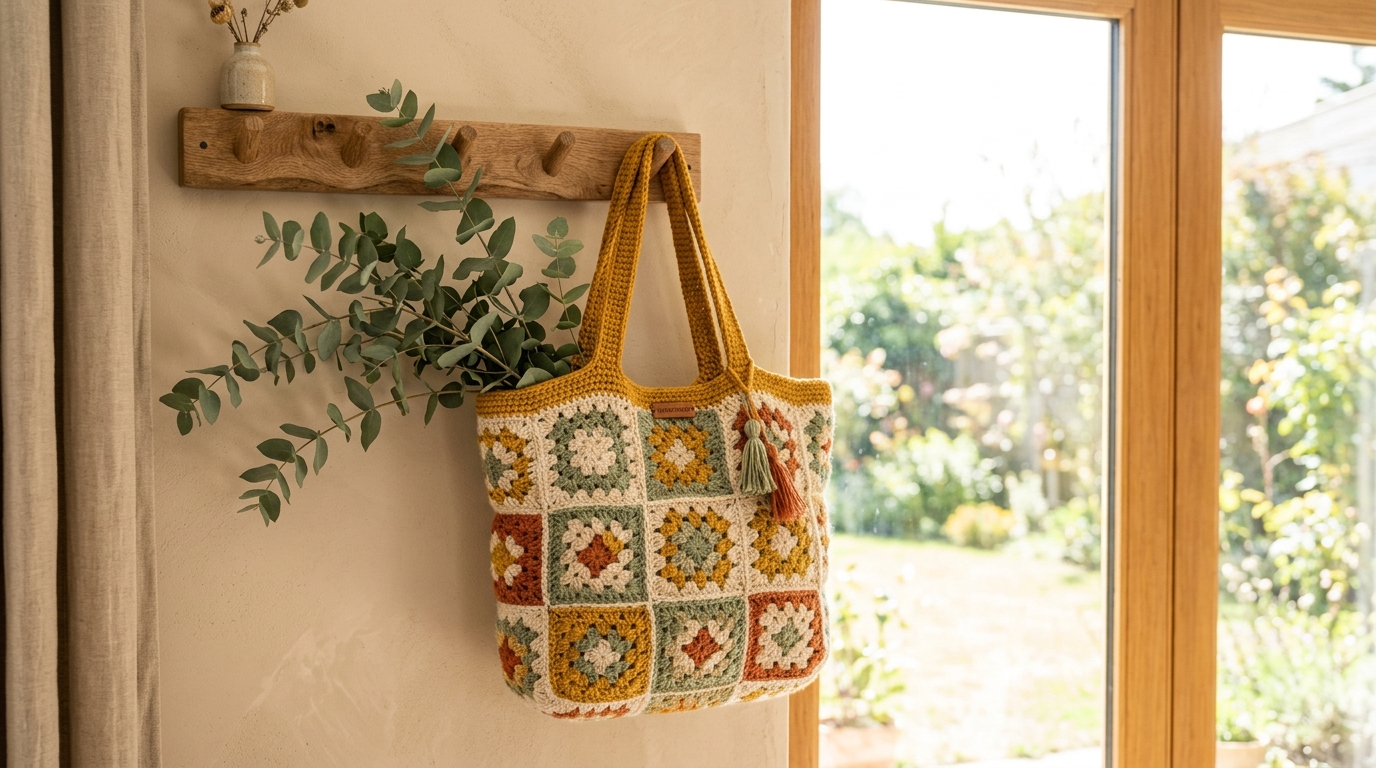
Transform 13 classic granny squares into a durable, chic, bohemian market accessory with this Modern Granny Square Tote Bag Free Pattern. In this comprehensive walkthrough, you will learn the exact 13-square geometric assembly layout, wet blocking methods for razor-sharp edges, invisible mattress stitch seaming, and double-thick thermal handles that will never sag under heavy grocery loads.
Why This Project Is Great
- Portable Modular Crafting: Crochet individual 4.5-inch squares anywhere, then assemble them all in one relaxed evening.
- High Durability: Dense cotton construction combined with thermal stitch handles easily carries books, laptops, and market produce without over-stretching.
- Endless Color Combinations: Mix earthy terracotta, sage green, cream, and mustard for a modern aesthetic, or use scrap yarn for a vibrant retro look.
Skill Level & Specifications
- Skill Level: Advanced Beginner (Requires double crochet granny clusters, blocking, and seaming)
- Finished Dimensions: 14 inches wide × 15 inches tall (excluding 22-inch shoulder handles)
- Square Size: Each square must measure exactly 4.5 × 4.5 inches after blocking
- Terminology: US Terms
Materials & Yardage Breakdown
- Main Color (Natural Cream): 250 yards of Category 4 Worsted Weight 100% Cotton (Recommended: Lion Brand 24/7 Cotton)
- Contrasting Colors: 75 yards each in Terracotta, Sage Green, and Mustard Yellow
- Crochet Hook: 4.00 mm (US G/6) — Note: Using a 4.0mm hook with worsted cotton creates sturdy fabric that resists sagging.
- Blocking Supplies: Foam blocking grid board and rust-proof stainless steel T-pins
- Tapestry needle and sharp scissors
Step-by-Step Pattern Instructions
1. Crocheting the 13 Granny Squares (Make 13 Identical Squares)
- Round 1 (Center in Mustard): In MR, ch 3 (counts as first dc), 2 dc into ring, ch 2. [3 dc, ch 2] × 3 into ring. Sl st to top of starting ch-3 to join. Fasten off. (4 clusters of 3 dc, 4 corner ch-2 spaces).
- Round 2 (In Terracotta): Join in any corner ch-2 space. Ch 3, (2 dc, ch 2, 3 dc) in same corner. *Ch 1, (3 dc, ch 2, 3 dc) in next corner; repeat from * 2 more times, ch 1, sl st to top of ch-3. Fasten off.
- Round 3 (In Sage Green): Join in corner. Ch 3, (2 dc, ch 2, 3 dc) in corner. *Ch 1, 3 dc in next side ch-1 space, ch 1, (3 dc, ch 2, 3 dc) in corner; repeat from * around, ending with ch 1, sl st to join. Fasten off.
- Round 4 (Border in Cream): Join in corner. Repeat Round 3 formula working 2 side clusters along each edge. Fasten off leaving clean tails to weave in.
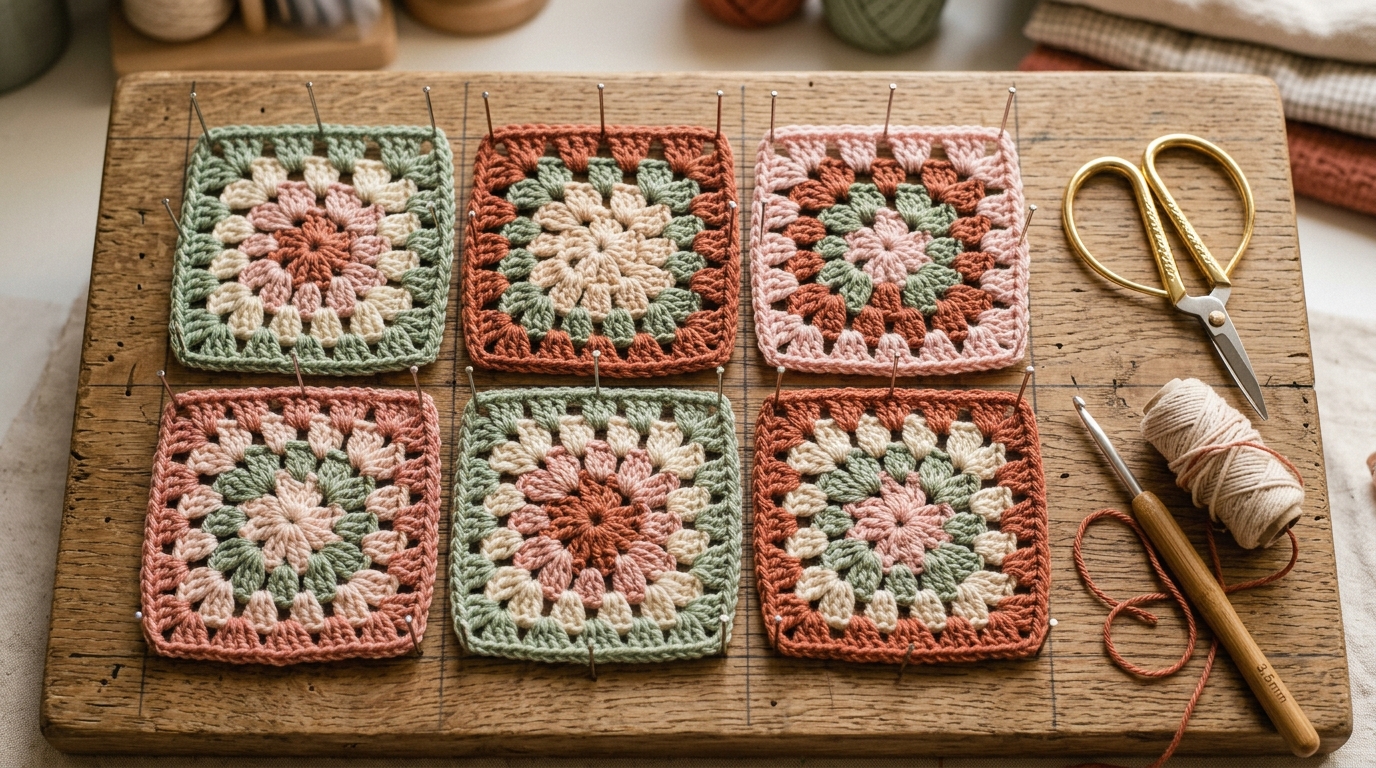
2. Blocking the Squares (Crucial Step)
Do not skip blocking! Pin all 13 squares onto your foam blocking board, pinning corners at exact 4.5-inch grid lines. Steam lightly with a garment steamer held 2 inches away (or spray thoroughly with lukewarm water) and allow to air dry completely for 24 hours. Properly blocked squares guarantee flat, puck-free seams.
3. The 13-Square Assembly Layout
Lay out your squares in a 3-row cross configuration: 3 squares in row 1, 5 squares in row 2, 3 squares in row 3, and 2 squares along the base gusset. Fold the outer corners upward to form the 3D bag structure. Thread your tapestry needle with Cream yarn and join adjacent squares using the Invisible Mattress Stitch through the inner loops only. Pull snug every 3 inches so the seam sits flush and flat.
4. Reinforced Sag-Proof Handles
Attach Cream yarn at the top point of any front corner square. Work 1 sc in each st around the bag opening. When you reach the top peak of the square, chain 70 for the shoulder strap (or 50 for a handbag handle), skip across to the opposite peak, and attach with 1 sc. Work 3 continuous rounds of Thermal Single Crochet across the rim and handles. This double-thick stitch structure locks the strap fibers and permanently eliminates handle stretching.
Common Mistakes & Fixes
- Bag stretches out when loaded: Caused by using soft acrylic yarn or loose gauge. Always use 100% mercerized cotton and drop down to a 4.0mm hook.
- Seams puckering or bunching: Caused by pulling seaming yarn too tightly or skipping stitch alignment. Count your stitches so every 3-dc cluster matches its partner square stitch-for-stitch.
Frequently Asked Questions
Should I line this crochet bag with fabric?
While our tight cotton gauge and thermal handles make lining optional, adding a simple cotton canvas lining prevents small items like pens and lip balm from slipping through corner chain spaces.