Free Crochet Strawberry Cow Pattern: Chubby Amigurumi Plushie
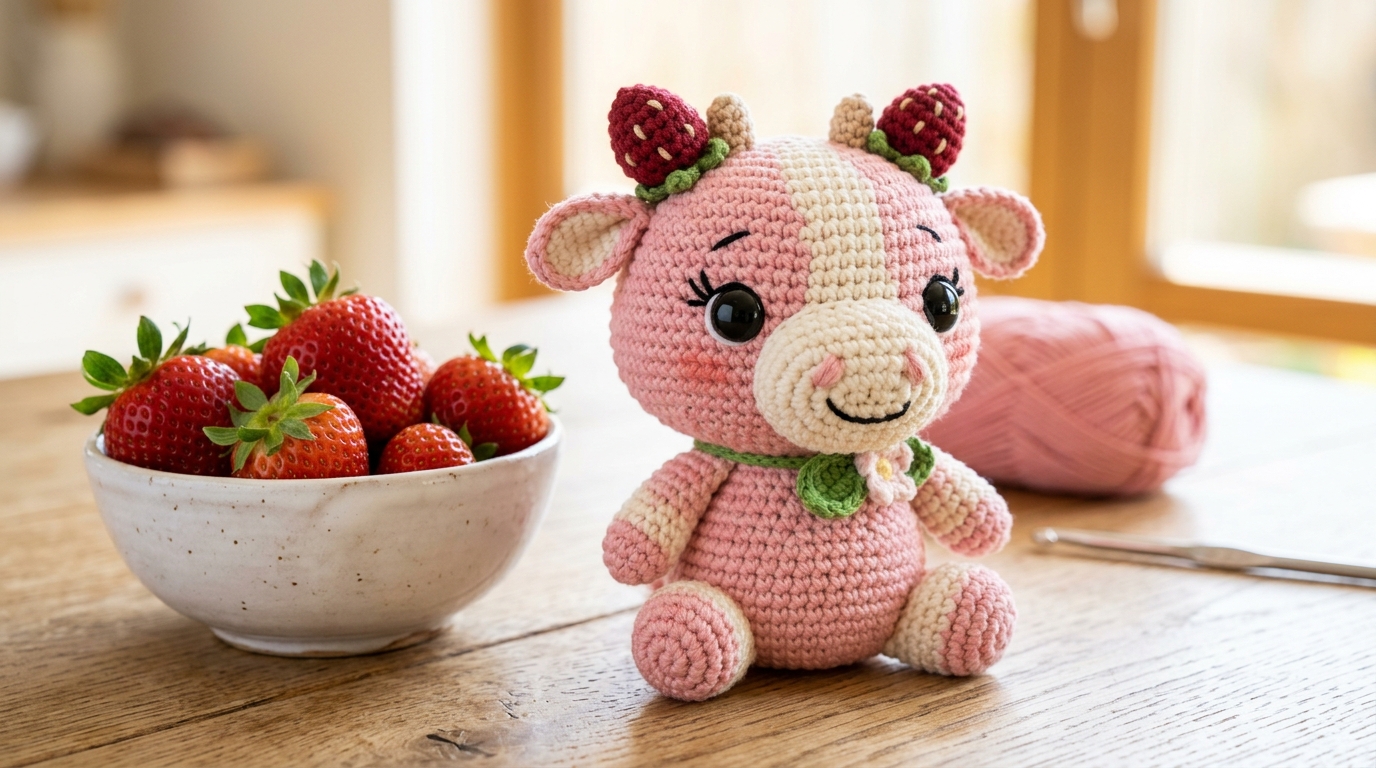
Pastel cottagecore charm and sweet farm aesthetics come together in this Free Crochet Strawberry Cow Pattern. Featuring soft pink dairy patches, a chubby oval snout, and two miniature textured strawberry horns with green calyx leaf caps, this project is a proven bestseller for craft fairs and a delightful gift for plushie lovers.
Why This Project Is Great
- Viral Kawaii Appeal: One of the most sought-after amigurumi designs on Pinterest and Etsy.
- Seamless Body Construction: The head and torso are worked in a single continuous piece to eliminate wobbly neck seams.
- Modular Horn & Snout Accents: Quick 5-minute components that add immense personality and texture without complicated assembly.
Skill Level & Specifications
- Skill Level: Easy / Intermediate Beginner (Requires working in the round, color changing, and basic component attachment)
- Finished Size: Approx. 5.5 inches (14 cm) seated height in worsted cotton (or 10 inches in bulky chenille)
- Time to Make: 2 to 2.5 hours
- Terminology: US Terms
Materials Needed
- Main Yarn: 75 yards of Category 4 Worsted Cotton in Cream White (Recommended: Paintbox Yarns Cotton Aran)
- Patch Yarn: 40 yards in Pastel Strawberry Pink
- Horn & Snout Yarn: 15 yards in Berry Red and 5 yards in Sage Green (for strawberry leaves)
- Hook: 3.50 mm (US E/4)
- Eyes: 10mm Black Plastic Safety Eyes
- Poly-Fil stuffing, stitch markers, and tapestry needle
Step-by-Step Instructions
1. Head & Body (Worked in One Piece from Top Down)
- Rnd 1: In Cream White, 6 sc in MR. (6)
- Rnd 2: Inc in each st around. (12)
- Rnd 3: [Sc in next st, inc] × 6. (18)
- Rnd 4: [Sc in next 2 sts, inc] × 6. (24)
- Rnd 5: [Sc in next 3 sts, inc] × 6. (30)
- Rnds 6–10: Sc in each of the 30 sts around. (Work 6 sts in Pink on Rnd 8 to create a forehead patch). (30)
- Eye Placement: Insert 10mm safety eyes between Rnds 8 and 9, spaced 7 stitches apart.
- Rnd 11: [Sc in next 3 sts, inv-dec] × 6. (24)
- Rnd 12 (Neck Round): [Sc in next 2 sts, inv-dec] × 6. (18) Stuff head firmly.
- Rnd 13 (Body Expansion): [Sc in next 2 sts, inc] × 6. (24)
- Rnd 14: [Sc in next 3 sts, inc] × 6. (30)
- Rnds 15–19: Sc around for 5 rounds, introducing random 4-to-6-stitch Pink patches on the back and flanks. (30)
- Rnd 20: [Sc in next 3 sts, inv-dec] × 6. (24)
- Rnd 21: [Sc in next 2 sts, inv-dec] × 6. (18) Stuff body firmly.
- Rnd 22: [Sc in next st, inv-dec] × 6. (12)
- Rnd 23: Inv-dec × 6. (6) Fasten off, cinch opening shut.
2. Oval Snout (In Pink)
Chain 5. Starting in 2nd ch from hook: sc in next 3 chs, 3 sc in last ch to pivot. Working down underside of chain: sc in next 2 chs, inc in last ch. (10 sts). Rnd 2: Inc, 2 sc, inc × 3, 2 sc, inc × 2 (16). Rnd 3: Sc around (16). Fasten off leaving tail. Embroider two small vertical nostrils with black floss and sew centered between the eyes across Rnds 9–12.
3. Strawberry Horns (Make 2)
- In Berry Red: Rnd 1: 4 sc in MR. (4). Rnd 2: [1 sc, inc] × 2 (6). Rnd 3: [2 sc, inc] × 2 (8). Rnd 4: Sc around (8). Fasten off.
- Calyx Leaves (In Green): Ch 3, sl st in 2nd ch, sc in last ch (repeat 4 times to make 4 tiny pointed leaves). Sew directly beneath the red strawberry horn. Attach both horns to top of head on Rnd 4.
Common Mistakes & Troubleshooting
- Snout looks square instead of oval: Make sure you pivot smoothly around the foundation chain ends without skipping stitches.
- Color change jumps: Always switch to your new yarn color on the final yarn-over of the stitch before the transition.
Frequently Asked Questions
How do I add strawberry seeds?
Thread golden-yellow embroidery floss onto a tapestry needle and make 1-stitch horizontal dashes scattered across the pink body patches.